Ruby TensorFlow
Porting TensorFlow to Ruby with the tensorflow.rb gem — the Ruby API, how Google Protobuf drives the graph internals, and Inception-v3 image recognition in Ruby.

Back in 2016 I spent a good chunk of my time porting TensorFlow to Ruby with the tensorflow.rb gem. I wrote three separate blog posts about it back then — an introduction to the Ruby API, a developer deep-dive into how Google Protobuf drives the graph internals, and a hands-on image recognition tutorial. This project stitches all three together into one, so the whole story lives in a single place.
Part 1 — Introducing the TensorFlow Ruby API
TensorFlow is an extraordinary open source software library for numerical computation using data flow graphs. It was originally developed by researchers and engineers working on the Google Brain Team within Google’s Machine Intelligence research organisation for the purpose of conducting machine learning and deep neural networks research, but the system is general enough to be applicable in a wide variety of other domains as well.
TensorFlow comes with an easy to use Python interface and a C++ interface to build and execute your computational graphs. However, TensorFlow was available only in Python, and due to the strong interest from the Ruby community, I took an interest in porting it. I started working on the Ruby API with support from Somatic.io and the SciRuby foundation and came across some cool things that I would like to share with you. At the time I was a student at the Indian Institute of Technology, Kharagpur. I was extremely fascinated with open source and machine learning and decided to take on this project for fun.
The project
I developed a simple gem, tensorflow.rb, and started with making use of SWIG. I tried countless different wrapper gems and different ideas in many permutations and combinations to finally come up with something that works. I’ll start with a few introductory examples to give people an idea about what is possible currently, and soon enough it would be easy for users to make extensive use of TensorFlow to accomplish extraordinary tasks such as image recognition or basic neural networks and much more.
Creating and running the graph in Ruby
Here is a small example that adds two tensors. This program prints the output [[6.0, 5.5], [57.0, 7.4]], which is the result of adding two tensors. The simplest explanation for this is:
graph = Tensorflow::Graph.new
tensor_1 = Tensorflow::Tensor.new([[2, 2.3], [10, 6.2]])
tensor_2 = Tensorflow::Tensor.new([[4, 3.2], [47, 1.2]])
placeholder_1 = graph.placeholder('tensor1', tensor_1.type_num)
placeholder_2 = graph.placeholder('tensor2', tensor_2.type_num)
Here we define two tensors and then we define two placeholders corresponding to those tensors.
opspec = Tensorflow::OpSpec.new('Addition_of_tensors', 'Add', nil, [placeholder_1, placeholder_2])
op = graph.AddOperation(opspec)
Then we specify an operation to add the two placeholders.
session_op = Tensorflow::Session_options.new
session = Tensorflow::Session.new(graph, session_op)
Then start a new TensorFlow session.
hash = {}
hash[placeholder_1] = tensor_1
hash[placeholder_2] = tensor_2
result = session.run(hash, [op.output(0)], [])
Then we define a new hash in Ruby with the key as the placeholder corresponding to the tensor and the value as the tensor, and then run the session to get results. The syntax is very easy to understand and produces the right result, so anybody can use it with basic knowledge of Ruby and TensorFlow.
Is that all?
Almost everyone can see that the above example simply didn’t live up to the hype I had been talking about for a while, so here is another interesting example of Ruby TensorFlow. This example shows you how to get the determinant of a batch of matrices. If you look closely, this is very similar to the previous example, with the difference being that I only have a single input and the op used is BatchMatrixDeterminant. The result is [[-45.0, -513.0, 1.0]], which is the determinant for the first, second, and third matrix. Actually you can do a LOT of good things such as:
- Arithmetic operators — addition, subtraction, element-wise multiplication, element-wise mod, etc.
- Basic math functions — element-wise exponent, element-wise power, element-wise log, trigonometric operations like tan, sin, cos, etc.
- Matrix functions (these are the best) — matrix inversion, matrix multiplication, determinants, diagonal, trace, solving a system of linear equations, cholesky decomposition, etc.
You can also do complex number functions too (like multiplying complex matrices).
A note for developers
I researched how the Python libs work internally, and basically the plan to generate the graph and plan how to execute it is managed from Python, which sends all the graph to be executed to the C++ libraries. These libs take the graph and execute all the nodes of the graph. Therefore, what we need to do is port the graph generation and planning code from Python to Ruby, and rely on the same C++ libraries for execution.
Part 2 — Ruby TensorFlow for developers
In this part I dwell upon simple and useful ideas that will help developers understand how Google Protobuf is used in Ruby TensorFlow. Even though the primary purpose is to explain the Ruby API, I am sure that developers specializing in different languages can greatly benefit from the ideas here.
Google Protobuf
Protocol buffers are a language-neutral, platform-neutral, extensible mechanism for serializing structured data. The method involves an interface description language that describes the structure of some data and a program that generates source code from that description for generating or parsing a stream of bytes that represents the structured data.
It helps define data structures in text files, and the protobuf tools generate classes in Ruby, C, Python, and other languages that can load, save, and access the data in a friendly way. Google developed Protocol Buffers for use internally and has provided a code generator for multiple languages. In this section I focus on Ruby protobuf, so to start it’s worth getting familiar with how they work.
GraphDef
The foundation of computation in TensorFlow is the Graph object. This holds a network of nodes, each representing one operation, connected to each other as inputs and outputs.
The GraphDef class is an object created by the ProtoBuf library from the definition in tensorflow/core/framework/graph.proto. The protobuf tools parse this text file and generate the code to load, store, and manipulate graph definitions. If you see a standalone TensorFlow file representing a model, it’s likely to contain a serialized version of one of these GraphDef objects saved out by the protobuf code.
This generated code is used to save and load the GraphDef files from disk. The code that actually loads the model looks like this:
require 'tensorflow'
graph_def = Tensorflow::GraphDef.new
This line creates an empty GraphDef object, the class that’s been created from the textual definition in graph.proto. This is the object we’re going to populate with the data from our file in irb.
reader = File.read('graph.pb')
graph_def = Tensorflow::GraphDef.parse(reader)
graph_def.node[0].name # => "input1"
graph_def.node[1].name # => "input2"
graph_def.node[2]
# => #<Tensorflow::NodeDef: name: "output", op: "Add",
#      input: ["input1", "input2"], device: "",
#      attr: {"T"=>#<Tensorflow::AttrValue: type: :DT_INT64 ...>}>
Nodes
Once you’ve loaded a file into the graph_def variable, you can now access the data inside it. For most practical purposes, the important section is the list of nodes stored in the node member. Each node is a NodeDef object, also defined in graph.proto. These are the fundamental building blocks of TensorFlow graphs, with each one defining a single operation along with its input connections. Here are the members of a NodeDef and what they mean:
- Name — every node should have a unique identifier that’s not used by any other node in the graph. The name is used when defining the connections between nodes, and when setting inputs and outputs for the whole graph when it’s run.
- op — this defines what operation to run, for example “Add”, “MatMul”, or “Conv2D”. When a graph is run, this op name is looked up in a registry to find an implementation.
- input — a list of strings, each one of which is the name of another node, optionally followed by a colon and an output port number.
- attr — a key/value store holding all the attributes of a node. These are the permanent properties of nodes, things that don’t change at runtime such as the size of filters for convolutions, or the values of constant ops. Because there can be so many different types of attribute values, there’s a separate protobuf file defining the data structure that holds them, in
tensorflow/core/framework/attr_value.proto.
Each attribute has a unique name string, and the expected attributes are listed when the operation is defined. If an attribute isn’t present in a node, but it has a default listed in the operation definition, that default is used when the graph is created.
Text or binary?
There are actually two different formats that a ProtoBuf can be saved in. Text Format is a human-readable form, which makes it nice for debugging and editing, but can get large when there’s numerical data like weights stored in it. Binary format files are a lot smaller than their text equivalents, even though they’re not as readable for us. You can find an example of a large binary file inside the inception_dec_2015.zip archive, as tensorflow_inception_graph.pb (this is the file used in the image recognition tutorial below).
In Ruby protobuf only the binary format is supported, which makes it a little more difficult for developers to use, but I added a simple way to achieve back-and-forth conversion from binary to human-readable format. A handy trick to generate and inspect graphs: go to the specs (for example the math spec) and, just after session.extend_graph(graph), add another line:
File.open('graph.pb', 'w') { |file| file.write(graph.graph_def_raw) }
And run the specs again. This will save the graph definition in a graph.pb file, and then you can convert it using the pb_to_pbtxt Python file to read it in human-readable form.
Part 3 — Image recognition in Ruby TensorFlow
Developers for tensorflow.rb had been having a long discussion about developing something really cool with Ruby TensorFlow, and so we decided to work on the image recognition tutorial and got some really interesting results that I’d like to share. Our main source of inspiration was the TensorFlow image recognition tutorial.
Image recognition
Our brains make vision seem easy. It doesn’t take any effort for humans to tell apart a lion and a jaguar, read a sign, or recognize a human’s face. But these are actually hard problems to solve with a computer: they only seem easy because our brains are incredibly good at understanding images.
In the last few years the field of machine learning has made tremendous progress on addressing these difficult problems. In particular, a kind of model called a deep convolutional neural network can achieve reasonable performance on hard visual recognition tasks — matching or exceeding human performance in some domains.
Researchers have demonstrated steady progress in computer vision by validating their work against ImageNet — an academic benchmark for computer vision. Google took this to the next step by releasing code for running image recognition on their latest model, Inception-v3. Inception-v3 is trained for the ImageNet Large Visual Recognition Challenge using the data from 2012. This is a standard task in computer vision, where models try to classify entire images into 1000 classes, like “Zebra”, “Dalmatian”, and “Dishwasher”. Inception-v3 reaches a 3.46% error rate for top-5 results.
This tutorial will teach you how to use Inception-v3 in tensorflow.rb. You’ll learn how to classify images into 1000 classes in Ruby.
Steps
- Clone and install tensorflow.rb
- Go to the image directory
- Download the
inception_dec_2015.zipfile from Google - Extract the file
tensorflow_inception_graph.pbinto this directory - Run
ruby classify_image.rb(this will work on the default image of the Mysore palace) - To try this out on your own images you can add the image to this directory and then change the file name on line 31 of
classify_image.rb
Examples
A few cool examples of using the image recognition tutorial. First let’s try this out on a cute puppy.
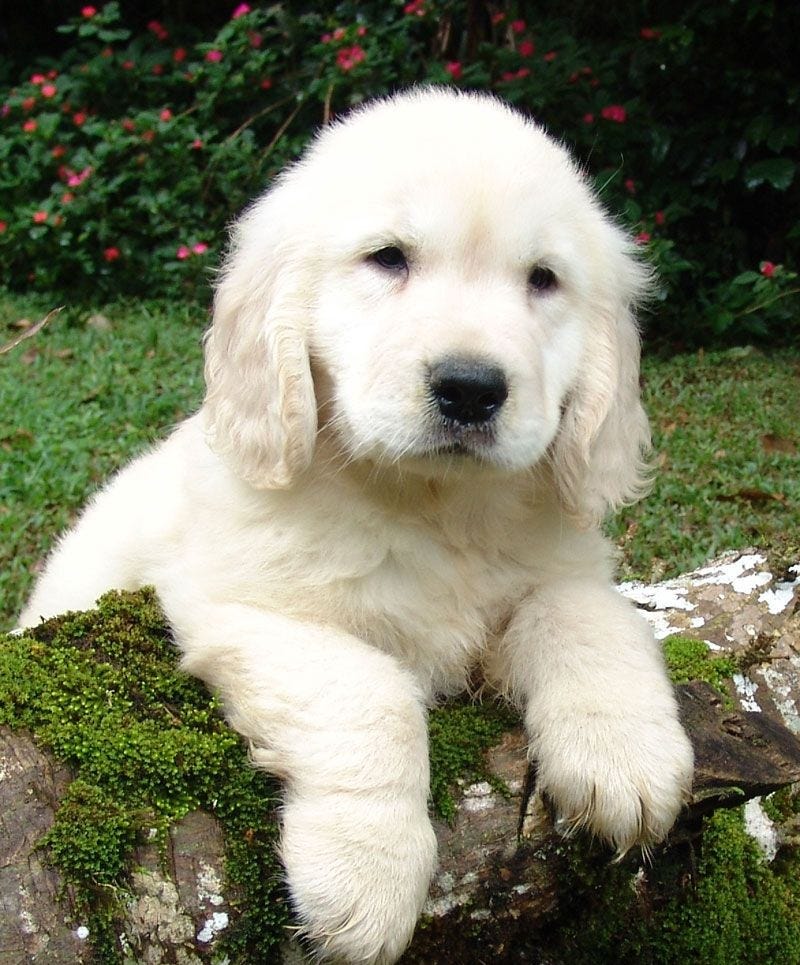
A palace?

A library?

Or a bridge?

The results are interesting, and I encourage you to play with tensorflow.rb and try it out on your own images. The deep learning model in Inception-v3 is described in the arXiv preprint “Rethinking the Inception Architecture for Computer Vision” and can be visualized with this schematic diagram:
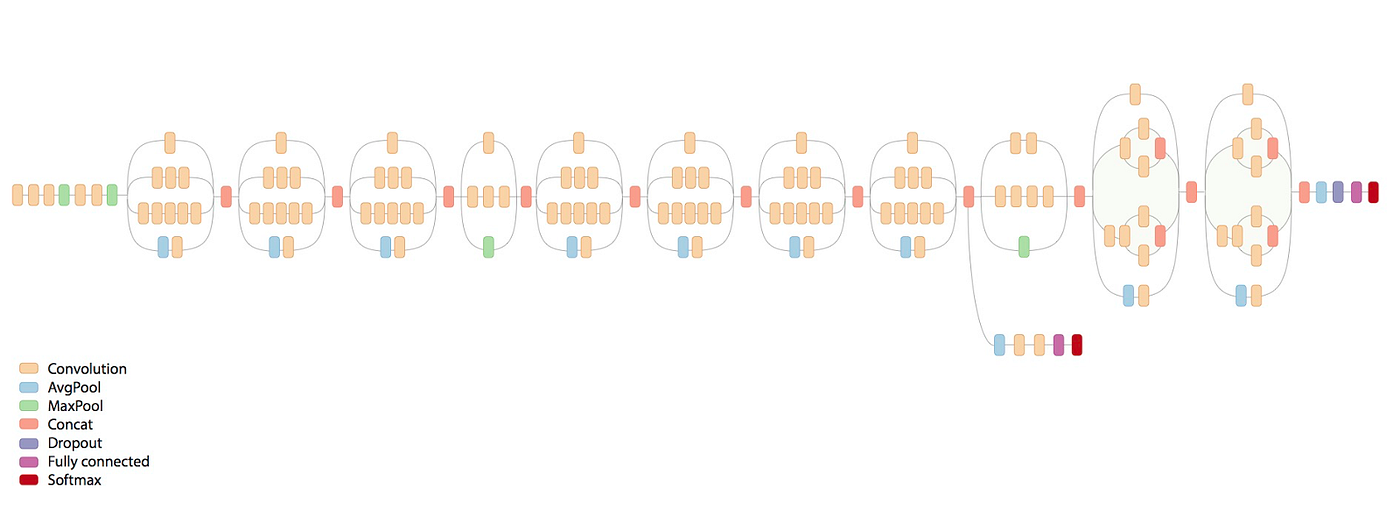
As described in the preprint, this model achieves a 5.64% top-5 error while an ensemble of four of these models achieves a 3.58% top-5 error on the validation set of the ImageNet whole-image ILSVRC 2012 classification task. Furthermore, in the 2015 ImageNet Challenge, an ensemble of 4 of these models came in 2nd in the image classification task.
Acknowledgements
Special thanks to Jason Toy (Founder, Somatic), Soon Hin Khor (PhD, Univ. of Tokyo), and Sameer Deshmukh (Founder of Daru and member of SciRuby) for being the mentors for this project. They were very supportive with everything, and I am very grateful to them.